
Ambler Exterior Painters’ Guide to Siding: What Works (and What Fails)
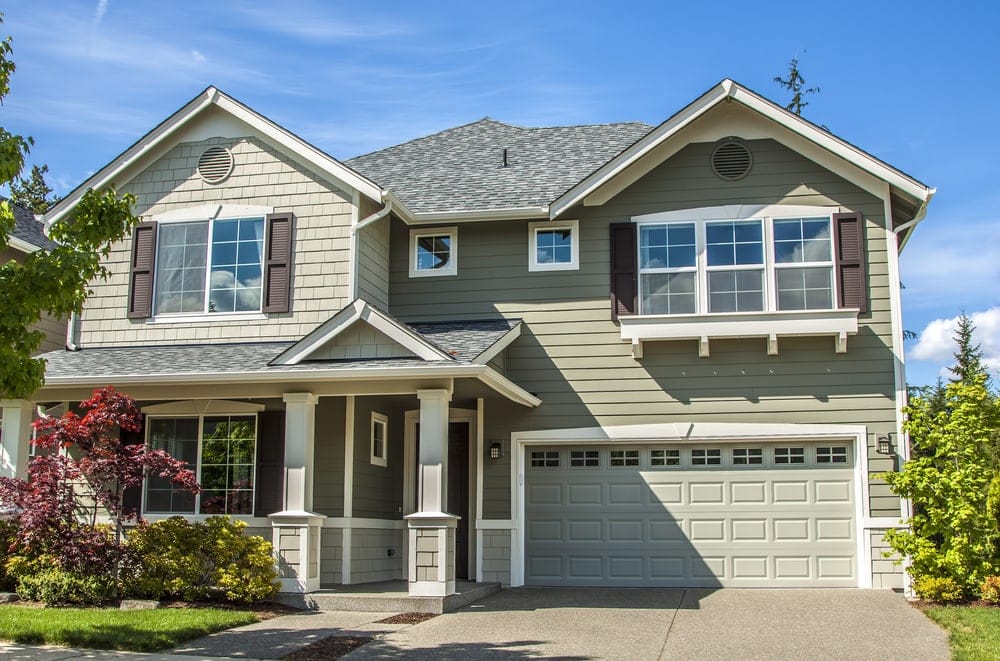
Exterior painting isn’t “one-size-fits-all,” especially in Ambler, where homes can range from older wood-sided properties to stucco, brick, and mixed-material exteriors.
If you’ve ever seen paint peel in sheets, fade unevenly, or bubble around trim, it usually comes down to one thing: the siding type wasn’t treated the right way before paint ever touched it.
This guide breaks down the most common siding materials around Ambler, what they need, and how Ambler exterior painters plan a job so it looks sharp and holds up.
If you’re already thinking about hiring help, you can also review Aspen Painting’s local page for Ambler exterior painters here: https://aspenpaintingpa.com/painters-ambler-pa/
Why siding type changes everything
Different materials “move” differently with temperature shifts, hold moisture differently, and accept coatings in different ways.
That affects:
- Surface prep (washing, scraping, sanding, repairs)
- Primer selection (bonding vs stain-blocking vs masonry)
- Coating choice (paint, stain, elastomeric, specialty masonry products)
- Dry time and scheduling (humidity matters a lot with some materials)
- Long-term durability (what will crack or peel first)
A smart exterior paint job is really a coating system—prep + repair + primer + topcoats—matched to the siding.
Quick siding ID checklist for Ambler homeowners
Not sure what you have? Here are fast ways to spot the basics:
- Wood siding: visible grain, seams between boards, may have knots, can feel softer than cement.
- Stucco: cement-like texture, often rough, may show hairline cracks.
- Brick: obvious brick units + mortar joints (often painted or unpainted).
- Vinyl: flexible panels, visible lap seams, hollow sound when tapped.
- Fiber cement (Hardie-style): looks like wood but feels harder and more uniform.
- Aluminum: metal feel, dents more easily than fiber cement, and chalky oxidation is common.
Once you know the material, the plan becomes much clearer.
Key benefits homeowners want (table)
| What you want | How the right siding plan helps |
| A finish that lasts | Proper primer + correct paint chemistry reduces peeling and early failure |
| Better curb appeal | Even sheen, clean lines, consistent color across mixed surfaces |
| Fewer repairs later | Sealing gaps, addressing rot/cracks early, prevents bigger issues |
| Cleaner looks longer | Better washing and prep help paint resist dirt and mildew buildup |
| Predictable results | Material-specific steps mean fewer surprises mid-project |
Painting wood siding in Ambler
Wood is classic—and it’s also the most demanding.
What usually goes wrong with wood
- Paint applied over loose, flaking layers
- Ignoring soft/rotted sections
- Skipping primer after bare wood is exposed
- Painting when moisture is trapped in boards
What a strong wood-siding process looks like
1) Wash, then dry fully
Power washing can help, but too much pressure can carve wood fibers. The bigger issue is drying time. Wood that’s still damp can trap moisture under paint and cause blistering.
2) Scrape + sand for solid edges
Scraping isn’t just removing flakes—it’s creating a stable edge so new paint doesn’t “telegraph” old peel lines.
3) Repair and replace where needed
Small rot repairs can sometimes be stabilized, but badly softened boards often need replacement. Painting over rot doesn’t “seal it in.” It just hides it until the next failure.
4) Prime bare wood
Bare wood needs primer for:
- adhesion
- stain blocking (knots/tannins)
- consistent topcoat appearance
5) Two finish coats
On wood, thin coverage is a common mistake. Two proper coats create the film build you need for durability.
Paint vs. stain for wood exteriors
- Paint offers stronger UV protection and color change options.
- Stain can look great, butit depends heavily on the wood’s condition and may need more frequent maintenance.
If your current surface is painted, switching to stain typically isn’t practical without major stripping.
Cedar and redwood: special wood notes
Some older Ambler homes include cedar shakes or similar materials.
Watch for:
- tannin bleed (brownish staining)
- uneven absorption
- prior coating failures that need more sanding and spot-priming
A stain-blocking primer is often the difference between a clean finish and frustrating bleed-through.
Painting stucco exteriors
Stucco is common in the area and can look fantastic when it’s coated correctly.
The #1 stucco issue: cracks
Not all cracks indicate structural problems, but they can allow water to intrude.
- Hairline cracks: often manageable with the right prep and coating system
- Wider cracks: typically need patching and may require additional attention before painting
What does stucco need before paint
1) Proper cleaning without damage
Stucco can hold dirt and mildew in its texture. Cleaning must remove growth without eroding the surface.
2) Repair and cure time
Patches need time to cure before coating. Rushing this step can lead to texture or coating mismatch or failure.
3) The right primer (or masonry conditioner)
Stucco can be porous. The goal is to prevent “thirsty” areas from soaking up paint unevenly.
4) Coating selection matters
Some homeowners ask about elastomeric coatings because they can bridge small cracks. These coatings aren’t automatically “better”—they’re a tool. Used correctly, they can help with hairline cracking. Used incorrectly, they can trap moisture.
Stucco color tips for Ambler homes
- Mid-tone neutrals often look clean and hide dust better than very dark colors.
- Flat finishes can minimize texture irregularities.
- Satin can look richer but may highlight patch differences.
Painting brick: painted vs unpainted brick
Brick is durable, but painting it changes its behavior.
Before painting brick, ask:
- Is the brick already painted?
- Does it show signs of moisture issues (efflorescence, damp patches)?
- Is the mortar in good shape?
If you paint a brick that has unresolved moisture problems, the coating may fail quickly.
Painted brick: maintenance approach
If the brick is already painted, repainting can be a solid upgrade—assuming prep is done right.
A typical plan includes:
- cleaning
- addressing chalking/loose paint
- masonry primer where needed
- finish coats matched to the surface condition
Unpainted brick: think carefully
Painting unpainted brick is a design choice that can look amazing, but it’s not “set it and forget it.” Once painted, the the brick will need to be repainted in the future.
Some homeowners prefer limewash-style looks. If you’re aiming for that aesthetic, it’s important to choose products designed for masonry breathability.
Fiber cement siding: great performance when prepped right
Fiber cement is popular because it’s stable and holds paint well.
Common fiber cement mistakes
- Skipping primer on cut edges or repairs
- Leaving gaps unsealed at joints
- Painting dusty surfaces (fiber cement dust can reduce adhesion)
What works best
- clean surface
- seal joints and penetrations
- prime exposed areas
- apply two uniform topcoats
This is a siding type where clean prep and clean application usually yield excellent durability.
Vinyl siding: can it be painted?
Yes—in many cases, vinyl can be painted, but it has rules.
What makes vinyl tricky
- It expands and contracts a lot.
- Dark colors can absorb heat and cause warping.
- Some vinyl is too chalky or slick without the right prep.
Best practices for painting vinyl
- Wash thoroughly to remove chalking and residue.
- Use coatings designed for vinyl adhesion.
- Avoid extreme color changes unless the coating line supports it.
If your vinyl is severely warped, cracked, or brittle, painting may not address the underlying issue. In that case, it’s better to talk through options before investing in paint.
Aluminum and metal surfaces
Metal siding and metal trim can last a long time, but oxidation is the enemy.
Signs of oxidation
- chalky residue on your hand after touching the surface
- dull, faded areas that don’t brighten after cleaning
What a good metal prep includes
- cleaning and deglossing
- addressing oxidation
- spot-priming, where bare metal is exposed
- using coatings that bond well to metal
Trim, railings, and metal doors also benefit from the right approach—especially when sun exposure is heavy.
Mixed-material exteriors: the most common scenario
A lot of Ambler homes have combinations like:
- brick lower level + siding above
- stucco front + siding sides/rear
- painted trim + stained doors
- fiber cement + metal accents
This is where experienced Ambler exterior painters really earn their keep, because each material may need:
- a different primer
- a different caulk/patch method
- different sheen levels for a balanced look
How to keep mixed materials looking consistent
- Use coordinated color families (avoid “almost matching” tones)
- Choose sheens that make sense per surface (trim often benefits from a slightly higher sheen)
- Plan transitions: where does one color stop and another start?
Prep details that matter more than the paint brand
Paint quality matters—but prep is usually the bigger factor in performance.
Caulking gaps (without creating problems)
Caulk helps keep water out, but over-caulking can trap moisture where it needs to escape.
A balanced approach:
- seal around windows/doors
- seal trim joints where water enters
- avoid sealing areas designed to drain or vent
Addressing mildew the right way
Painting over mildew doesn’t fix it. It often comes back through the new coating.
The correct approach:
- remove it during wash/prep
- allow dry time
- choose coatings that resist mildew growth
Handling chalking surfaces
Chalking is common on older paint or some siding types. If the chalk isn’t removed or stabilized, new paint can lose adhesion.
Timing matters in Ambler: when to paint exterior siding
The best results generally come when:
- daytime temps are stable
- overnight temps aren’t dropping too low
- humidity isn’t excessive
- the surface can dry properly after washing
If you’re planning a repaint, schedule flexibility can help your contractor pick better painting windows.
Choosing exterior colors that fit Ambler homes
Color choice isn’t just a matter of style—it can affect maintenance.
Practical color notes
- Very dark colors can show fading faster in direct sunlight.
- Very bright whites can show dirt more quickly.
- Mid-tone neutrals often look clean longer and complement most roofs/stonework.
Trim contrast tips
- Subtle contrast = classic, calm curb appeal
- Strong contrast = bold lines and a modern feel
If your home has multiple materials (brick, siding, and trim), try to keep the palette tight so it doesn’t feel busy.
Questions to ask before hiring Ambler exterior painters
If you want fewer surprises, ask these early:
- What repairs are included vs extra?
- How will you handle bare wood, cracks, and peeling areas?
- What primer will you use for my siding type?
- How many coats are planned—and where?
- How do you protect landscaping and hardscape?
- What’s the plan for weather delays and dry time?
A clear plan is usually a sign you’re dealing with a team that paints exteriors regularly—not occasionally.
A simple siding-specific checklist you can use today
Walk your exterior and note:
- peeling paint areas
- open seams at trim or siding joints
- visible wood softness/rot
- stucco cracks (size and location)
- brick moisture signs (white powdery residue or damp spots)
- chalking when rubbed by hand
- failing caulk around windows and doors
This short list helps you get better estimates because you’ll be comparing similar scopes of work.
Siding guides the strategy
If you take one thing from this post, let it be this:
The siding material should decide the prep, primers, and coatings—not the other way around.
That’s how you get a finish that looks clean, holds up through the seasons, and doesn’t force you back into repainting sooner than expected.
If you’d like Aspen Painting to take a look at your exterior in Ambler, start here: https://aspenpaintingpa.com/painters-ambler-pa/
FAQs
1) How long does exterior paint last on wood siding in Ambler?
It depends on sun exposure, prep quality, and the condition of the existing coating. With proper scraping, priming, and two finish coats, wood siding typically holds up well for years before needing touch-ups or a full repaint.
2) Can stucco be painted if it has cracks?
Yes, but cracks should be evaluated and addressed first. Hairline cracking can often be handled with the right repair steps and coating plan. Wider cracks usually need patching before paint.
3) Is it a bad idea to paint unpainted brick?
Not automatically, but it’s a permanent change. Painted brick will need maintenance and repainting over time. It’s also important to check for moisture issues first, so paint doesn’t fail early.
4) Can you change vinyl siding to a darker color with paint?
Sometimes, but it needs caution. Darker colors can increase heat absorption and may risk warping depending on the vinyl and paint system. A contractor should confirm what’s safe for your siding.
5) What’s the most important step for a long-lasting exterior paint job?
Prep. Cleaning, drying time, scraping/sanding, repairs, and correct priming are usually the biggest factors in whether paint stays bonded and looks even.

Ray is an inspiring leader with a strong work ethic stemming from his exemplary upbringing in a caring and loving family environment. His parents modeled the importance of integrity and hard work to him and his siblings, values which Ray now instills in his teenage daughter. As the owner of Aspen Painting & Wallcovering, Inc., he leads by example by expecting nothing but the best from himself and his employees. His primary goal is to provide superior service and quality craftsmanship to each of his clients so that they become enthusiastic ambassadors for the company. Ray is a passionate team player who always strives to exceed expectations.